
5 Unique Wax Seal Ideas
After several years as a professional wedding stationer, I have worked with countless wax seals. Both for clients and for personal pleasure! So you better believe that I have a few tricks up my sleeves—which could be why I have a growing collection of wax seal videos on my YouTube channel and here on the blog. Since publishing my first wax seal tutorial, I have grown and explored more and more ways to use and play with wax seals in ways that are unique, beautiful and therapeutic. Some of these techniques you are probably familiar with if you’ve watched my YouTube videos for any length of time (such as marbled wax seals), but I’m pretty confident that there are a few tricks that you haven’t tried or thought of yet!
Whether you’re using a glue gun or a sealing spoon, I trust that you will find new ways to play with wax seals in this wax seal tutorial video full of fun ideas. Enjoy!
Some of the links below are affiliate! Thank you for supporting my business
SUPPLIES:*
- Blushed Bride Stamp: https://bit.ly/3bt4c9L
- Vintage Peonies Stamp: https://bit.ly/3AVacCV
- Heron Stamp: https://bit.ly/3Od78VX
- Botanical Initial “C” - Available upon request
- Vellum Wax: https://bit.ly/3OhZrxE
- Prosecco Wax: https://bit.ly/3uStrcy
- Dusty Blue Wax: https://bit.ly/3ckGeOG
- Blush Wax: https://bit.ly/3yLqI63
- Lavender Wax: https://bit.ly/3OcxOWP
- Silver Sage Wax: https://bit.ly/3yKS786
- Champagne Wax: https://bit.ly/3yNlG8R
- Glue Gun: https://bit.ly/3R3aWf8
- Sealing Spoon: https://bit.ly/3bt4c9L
1 - Add Dried Flowers
Okay, so this isn’t a super “new” or unique idea, but I think that this fun idea is limitless! Instead of simply placing a flower on top of a wax seal and enjoying the color play (or praying that you flower looks cute when it’s “squished”), think of your wax seal as a canvas. How can you make a beautiful composition within the wax seal, using the flowers and the pattern (or lack there of) on the stamp and come up with something truly unique and beautiful? As you place your petals, consider the composition of the seal as a whole—do you want the petals to take center stage? Then perhaps an arrangement in the center is the best way to show them off! Do you want the seal to come through? A particular element of the wax seal pattern needs emphasis? Make sure that the petals are arranged in such a way as not to cover up that impression on the seal.
The best part is that you can't go wrong when adding flowers! The beauty of the color play and the natural and man made elements in harmony together will turn heads regardless of how thoughtful the composition is!
Dried flowers are my favorite to work with because they are a little more predictable and easy to control. For more control as you place these beauties on your hot wax, break up the dried petals a little more so that the fine “confetti” falls more gracefully.
2 - Feathers!
You know that I love a little bit of history, right? So I went full nerd on this one!
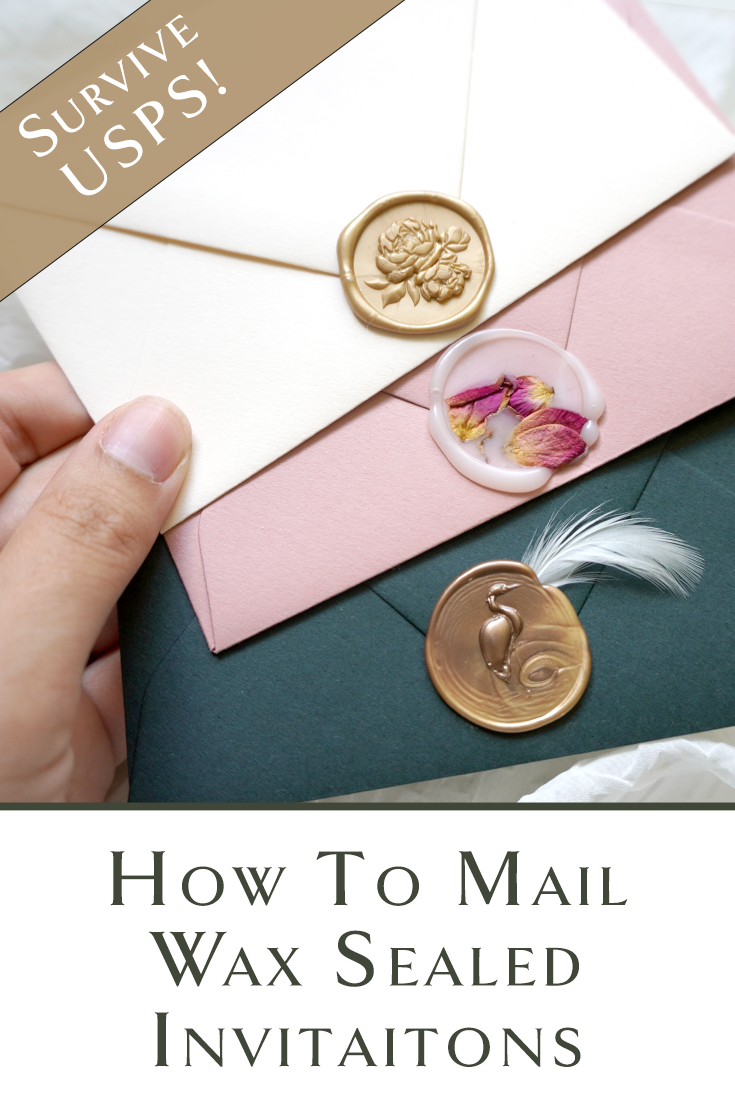
Historically, feathers added to the exterior of a parcel or envelope signaled to the postman that this specific transaction needed to be sent quickly. When the postman saw a feather, he knew to “give it wings” if you will. That parcel was then given priority! So fun, right? I’m sure they had to quit following that protocol due to everyone deciding that their correspondence was of top priority or something like that, but I love the romance and beauty of it.
Feathers can be tricky due to their structure. To help, place a small amount of wax down first (and press to seal), so that when you place the final wax and stamp, you can focus all of your energies on the stamp impression and not fuss with the feather
3 - Raw Edge Wax Seals
This one is new to me! At first, I admit, I was a little turned off. Frankly, I didn’t care for the look and longed for my traditional, “organic edge” wax seals instead.
But it’s grown on me. I am really intreated by it now and even like the idea of a messy, half raw edge seal in a true “hurried lord sending important news to the king” fashion (is my history nerd showing?). Regardless, I think you’ll find that this style grows on you too! I don’t love it for all designs, but it is definitely a fun effect for wreaths or florals. And SO EASY! Simply apply a little less wax to your envelope than you would typically use (I find that just under a full pump is perfect for a deeper, 3D stamp) and stamp right in the center! Ta-daaaa! A beautiful, unexpected, raw edge wax seal. So fun!
4 - Marbled Wax Seals
I won’t stay here too long because you all know that I LOVE marbled wax seals! And if you’re interested in learning more about the techniques that I showed in the video (along with a few other options depending on what you have on hand or timeline), you can watch my full marbled wax seal tutorial here. If you want something truly unique, colorful and playful, then marbled wax seals is the way to go! I especially love them around Christmas time—they can be a great way to add a little more personality and life to your Christmas wrapping or holiday cards.
5 - Add gold paint!
This one is a little harder than it looks but such a fun effect! I like to use a flat brush with baaaarely any paint on it and work slowly over the raised part of the wax seal impression. I used Paper Fashion’s gold paint (silver here), but you can try a number of different gold paints (and different colors) for a similar effect—Acrylic paints is probably where I would start if I was on the hunt today.


Some of the links use in this post are affiliate.
You can read my full disclosure and policies here